Overview
The Social Campaigns page is your central dashboard for managing all social media campaigns. Each campaign entry displays:
- Name: the campaign name
- Locations: the locations where the campaign will be displayed
- Channels: the social channels where the campaign will be promoted
- Run period: the start and end date of the campaign
- Status: the current status (e.g., scheduled, draft, or active)
- Actions: available actions like editing or delete
You can enable additional columns, such as create and edit date, via the "Columns" button at the top right.

Creating a new campaign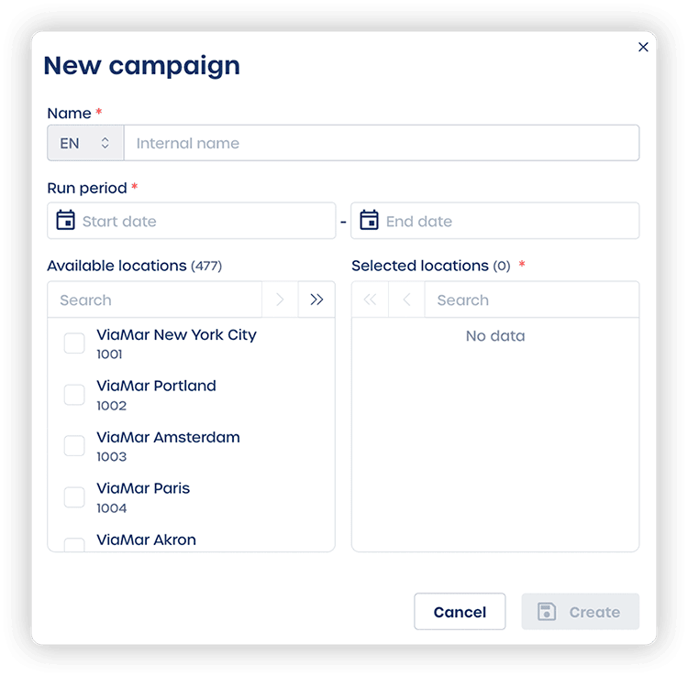
- Click "New social campaign" in the top right corner
- Fill in the campaign details:
- Campaign name
- Start and end date
- Target locations
- Click "Create" to save the campaign
💡 Tip: After creating a new campaign, you can set up an opt-in/opt-out workflow for your social campaign participants.
Monitoring your campaigns
- View campaign status in the "Status" column
- Use the Actions menu to:
- Edit campaign details
-
- Delete the campaign
- Filter campaigns using the search and filter options
Best practices
- Use descriptive campaign names because they can be used for opt-in or opt-out messages to your users.
Example: Summer Sale 2025 Facebook & Instagram - Target specific locations and channels based on your audience demographics
- Plan your campaign schedule in advance
- Regularly review campaign status and performance
This is step 1 of setting up your social campaign. For the next step, see How do I manage channels in my social campaign?