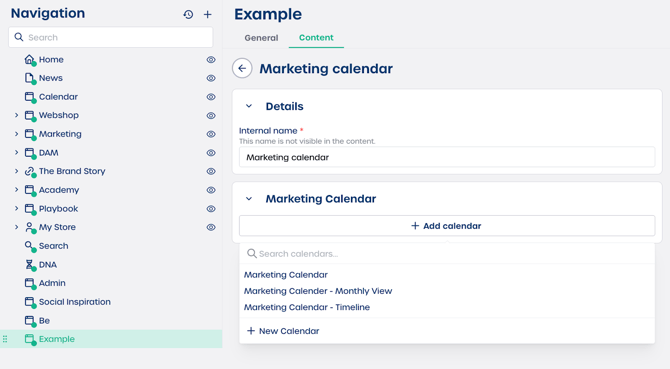
How do I add a Marketing Calendar to a page?
Step 1. Select the Marketing Calendar element
-
Navigate to "Pages" in your CMS.
-
Select the page you want to edit.
-
Select the "Content" tab.
-
Click the Marketing Calendar element to add it to the page.
The configuration panel opens automatically.
Step 2. Configure the Marketing Calendar element
You will see two fields that you can update.
Details
Enter an internal name for this block. For example, Team event schedule. This name helps you recognize the block in the backend and is not visible on the live page.
Marketing Calendar
Select the calendar you want to embed. Choose an existing schedule or select "+ Add calendar".
You can choose from views such as Marketing Calendar Monthly View or Marketing Calendar Timeline. These are configured in Communication, then Marketing Calendars.
⚠️ Important: Make sure the calendar you select is active and contains the correct schedule.
Step 3. Finalize and view the calendar
-
Review your selected calendar.
-
Click "Save".
-
Publish the page if needed.
The element will show the calendar automatically based on the view you selected. The information is dynamic. Any updates made in the Marketing Calendars section will appear on the page right away.
