How to create a new post
-
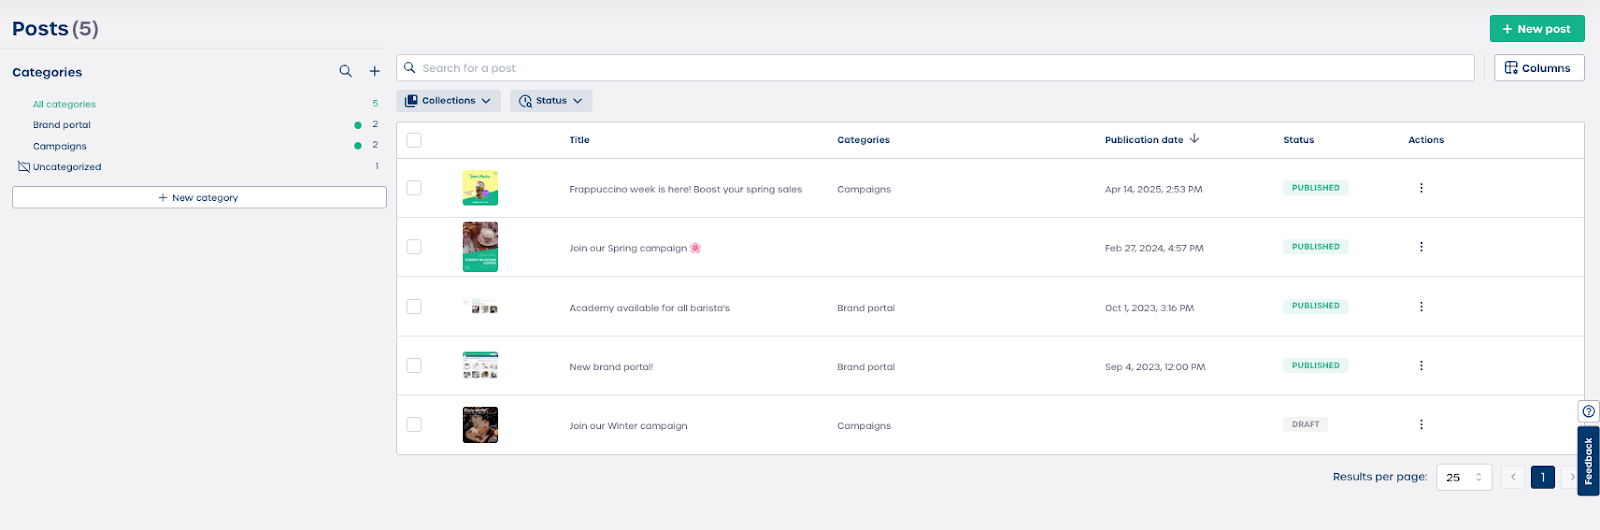
Navigate to "Posts" in your CMS.
-
Review the overview page. You will see:
-
A left sidebar with all Categories such as "Brand portal" or "Campaigns"
-
A table with existing posts including Title, Categories, Publication date, and Status
-
-
Click "+ New post" to start creating a new article.
How to edit post details
-
Select an existing post from the list such as "Frappuccino week is here".
-
Review the sidebar sections which guide you through the setup. These include "Details", "Content", "Layout", and "Permissions".
Details section fields
-
Title
Enter the public facing headline for your post. This field is mandatory. -
Thumbnail
Upload an image to use as the preview thumbnail in the post list. -
Status
Select whether the post should be PUBLISHED or remain UNPUBLISHED. -
Publication date
Enter the date the post becomes visible to users.
How to add content and organize your post
Content section
-
Navigate to "Content".
-
Write your post using the rich text editor.
-
Add promotional details, pricing information, or instructions as needed.
-
Use formatting tools to create headings, bold text, lists, and links.
Organize section
-
Tags
Add keywords that help users find your post through search. -
Collections
Add the post to Collections if your organization uses them. -
Categories
Select one or more Categories so your post appears in the correct feed.
Note: Assigning the correct Category ensures users see the post in the right place.
How to configure layout and permissions
Layout section
-
Navigate to "Layout".
-
Upload a background image for the post.
-
Review the maximum size guidelines such as maximum size 1920x1080 px.
Caution: Large image files may affect loading speed.
Permissions section
-
Navigate to "Permissions".
-
Choose whether visibility is controlled by Groups or Locations.
-
Review the list of Available groups such as "Netherlands" or "External users".
-
Move the correct groups to "Authorized groups" to grant them access.
⚠️ Important: Only users in Authorized groups or Locations will be able to view the post after publication.