How do I add the DAM to a page?
Step 1. Select the DAM element
-
Navigate to "Pages" in your CMS.
-
Select the page you want to edit.
-
Select the "Content" tab.
-
Click the DAM element to add it to the page.
The configuration panel opens automatically.
Step 2. Configure the DAM element display
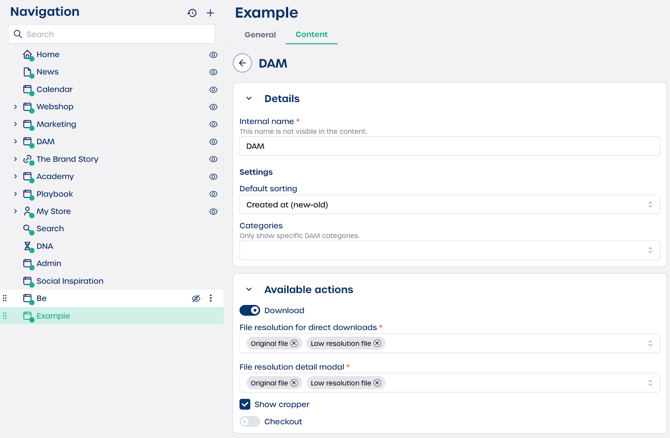
You will see two main areas you can update.
Details
Enter an internal name for this block. This helps you recognize it in the backend and is not visible on the live page.
Settings
Control how assets appear in the viewer.
Default sorting
Choose how files should be ordered when the page loads. You can sort by Created at, Edited at, Name or file size.
Categories
Select specific categories when you want to show only part of the DAM instead of the full library.
Note: If you do not select categories, the entire DAM will be visible.
Step 3. Define available user actions
You can choose what users are allowed to do with the files.
Download
Control download options.
-
File resolution for direct downloads
Set which resolutions appear when a user clicks download, for example Original file, Low resolution file. -
File resolution detail modal
Choose which resolutions are shown when the user opens the detail view modal.
Show cropper
Select this option to allow users to crop images before downloading them.
Checkout
Enable this option if you want users to add assets to a checkout cart. This helps users collect multiple files before downloading them.
