Step 1. Select the DNA element
-
Navigate to "Pages" in your CMS.
-
Select the page you want to edit.
-
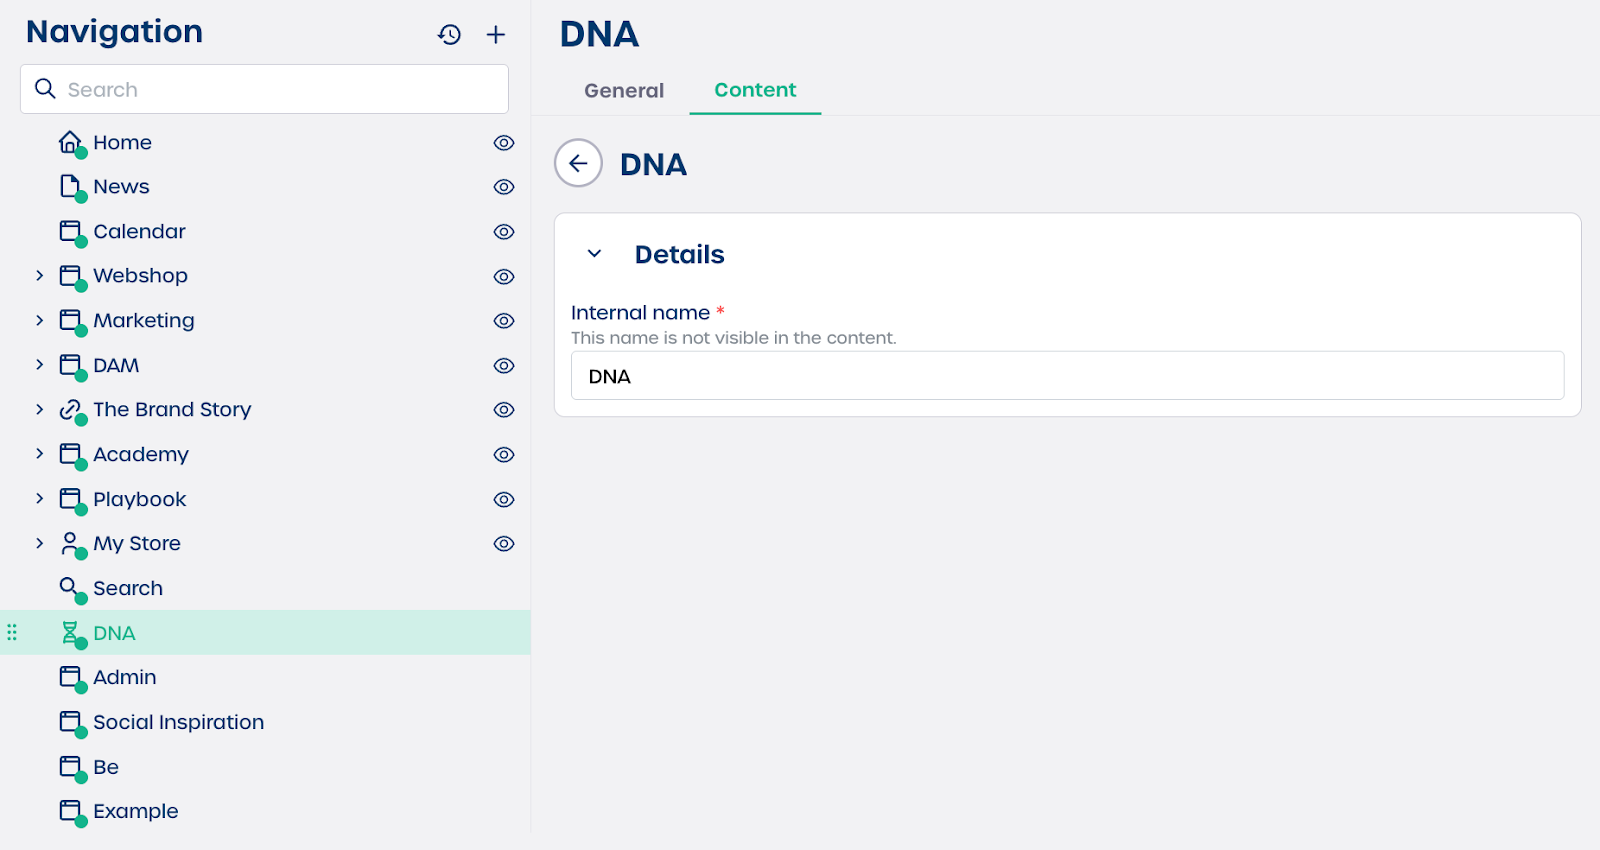
Select the "Content" tab.
-
Click the DNA element to add it to the page.
The configuration panel will open automatically.
Step 2. Configure the DNA element
You will see two fields that you need to complete.
Internal name
Enter a name that helps you recognize the content block in the backend. For example, you can use a name such as Product spec sheet or Legal disclaimer. This name is required and is not visible on the live page.
DNA
Select the DNA data source you want to display. This connects the element to the structured data that will appear on the page.
⚠️ Important: Make sure the DNA source you select is complete and up to date before publishing the page.
Step 3. Finalize and view your content
-
Review your settings.
-
Click "Save".
-
Publish the page if needed.
The system will automatically display the structured data from your chosen DNA source on the live page. You do not need to style or format this content manually.
Tips
-
Use clear internal names so you can manage multiple DNA blocks easily.
-
Confirm that your DNA data source is accurate before linking it to a page.
-
If your DNA fields change in the future, the page will update automatically.