Steps to add a new product
1. Access the product overview
-
Navigate to Marketing Shop in the left menu.
-
Select Products.
-
Select New product in the top right corner to open the product dialog.
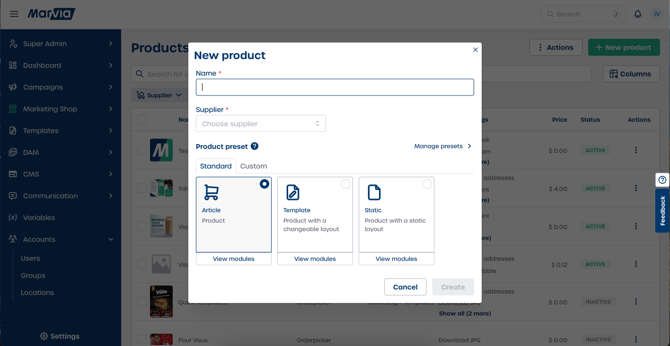
2. Enter product details
-
Enter the product name in the Name field. This field is required.
-
Select the supplier by opening the Supplier dropdown.
3. Choose a product preset
Presets help you start with a pre configured product setup.
Standard presets
-
Article
Best for standard products with basic features. This is the default option. -
Template
Use this when your product needs customizable layouts and editable content. -
Static
Select this when your product uses a fixed layout that will not change.
Custom presets
If you have saved custom presets before:
-
Select the Custom tab.
-
Choose one of your saved configurations.
4. Review preset modules
-
Select View modules under your chosen preset.
-
Review the included modules to confirm the preset supports the features you need.
5. Create your product
-
After completing all fields, select Create.
-
Your new product opens automatically so you can continue the setup.
Managing presets
Select Manage presets to create, edit, or delete custom presets. This opens the Product Presets page in Marketing Shop settings.
Tip: Create custom presets for product types you add often to save setup time.